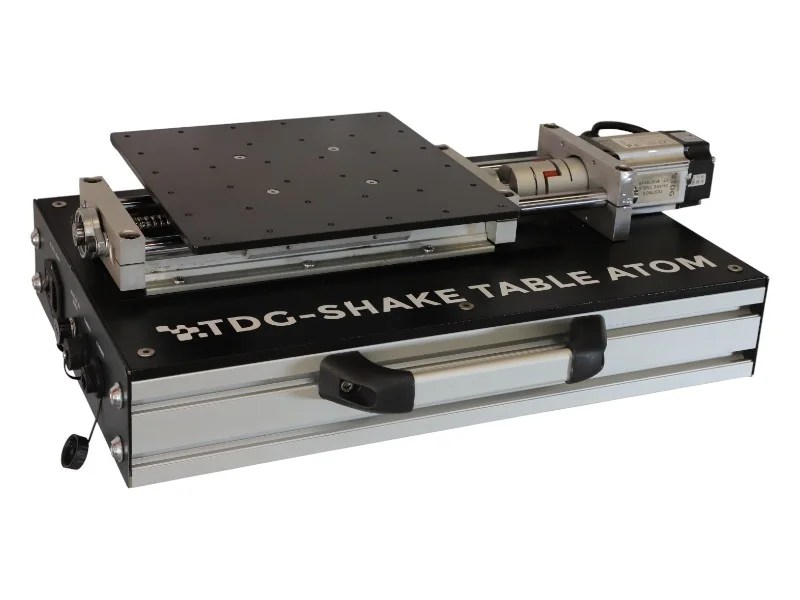
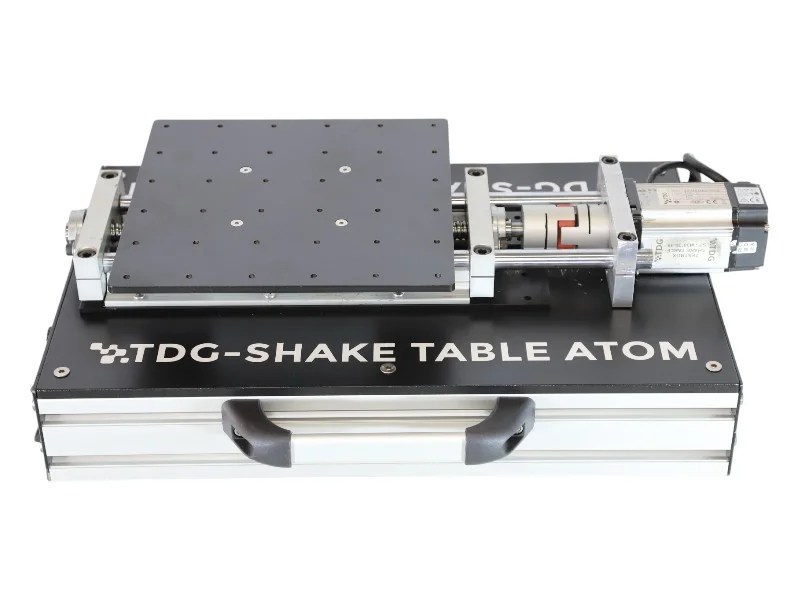
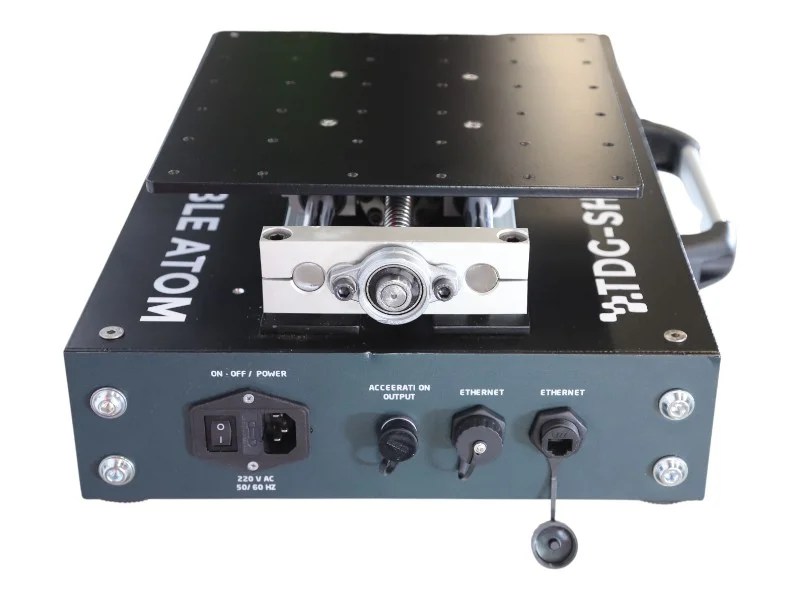
QuakeLogic is proud to introduce our state-of-the-art 1-ton Uniaxial Shake Table, designed to bring unparalleled precision and power to your seismic testing needs. With a 1-ton payload capacity, this shake table is an indispensable tool for engineers and researchers focused on enhancing structural integrity and earthquake resilience.
Key specifications
A spacious top table with dimensions of 150×150 cm (L x W), capable of delivering up to ±1 g acceleration at 1-ton capacity, with a stroke of ±200 mm.
Powered by an advanced electro-mechanical servo motor, this shake table ensures smooth and quiet operation. Unlike traditional hydraulic systems, our shake table is practically maintenance-free, making it a hassle-free addition to your lab.
This IP-based system allows for remote operation and monitoring, providing flexibility and control like never before. Designed for ease of use, the shake table comes with our intuitive EASYTEST software, which requires no specialized computer cards and runs seamlessly on any Windows machine. Plus, its compact design means it’s ready to be installed quickly, so you can start testing without delay.


For more information, visit our product page HERE or contact us at sales@quakelogic.net

About QuakeLogic
QuakeLogic is a leading provider of advanced seismic monitoring solutions, offering a range of products and services designed to enhance the accuracy and efficiency of testing, data acquisition, and analysis.
Contact Information:
- Email: sales@quakelogic.net
- Phone: +1-916-899-0391
- WhatsApp: +1-650-353-8627
- Website: www.quakelogic.net
For more information about our products and services, please visit our website or contact our sales team. We are here to help you with all your testing and monitoring needs.
Last reviewed: 2026-07-04
Executive Summary
Shake tables reproduce controlled motion in the laboratory so engineers can evaluate components, assemblies, soil boxes, and structural models under seismic inputs. This article has been expanded as an engineering resource for readers evaluating shake tables concepts, instrumentation choices, and monitoring workflows. The discussion is educational and should be paired with project-specific review by qualified engineers, applicable codes, owner requirements, and equipment documentation.
Key Takeaways
- Define the engineering objective before selecting sensors, test equipment, trigger thresholds, or reporting workflows.
- Use calibrated instrumentation, documented installation practices, time synchronization, and traceable data handling where measurement quality matters.
- Interpret measured data in context: site conditions, structure type, noise environment, sampling rate, bandwidth, and boundary conditions all affect conclusions.
- Use authoritative references and project-specific criteria rather than relying on generic thresholds or unsupported performance claims.
Technical Explanation
In practical shake tables work, the engineering system is more than a sensor or a test platform. A credible workflow includes the measurement objective, instrument selection, mounting or boundary conditions, sampling and timing strategy, data validation, event or response detection, engineering review, and reporting. Weakness in any part of that chain can reduce confidence in the final interpretation.
For monitoring applications, engineers should document sensor orientation, coupling, environmental exposure, dynamic range, frequency bandwidth, data logger configuration, clock synchronization, communications, and maintenance procedures. For testing applications, engineers should document input motion, fixture design, payload properties, control limits, safety interlocks, acceptance criteria, and post-test data review.
Engineering Applications
| Application | Engineering Question | Typical Evidence Needed |
|---|---|---|
| Research and education | How does a structure, component, or sensor respond under controlled conditions? | Test plan, calibrated data, input motion, boundary conditions, and repeatable observations. |
| Critical infrastructure | Is the asset response normal, changing, or potentially unsafe after an event? | Baseline data, event records, thresholds, inspection workflow, and engineering sign-off. |
| Industrial facilities | Can monitoring support operational continuity and response decisions? | Site-specific criteria, reliable telemetry, alarm logic, maintenance records, and documented procedures. |
People Also Ask
What should be specified before buying equipment?
Specify the measurement objective, frequency range, amplitude range, environment, data format, timing needs, installation constraints, reporting requirements, and applicable standards or owner criteria.
Why do references and standards matter?
They provide terminology, acceptance criteria, test methods, and documentation expectations. They do not replace engineering judgment, but they reduce ambiguity and make results easier to review.
How should data quality be checked?
Review calibration status, timing, clipping, sensor orientation, signal-to-noise ratio, environmental artifacts, data completeness, and whether the record supports the engineering decision being made.
Related QuakeLogic Resources
- University of Washington Receives Next-Gen Seismic Testing Technology from QuakeLogic
- Bringing Earthquake Science to Life in the Classroom with the ATOM Shake Table
- Instructions for Maintaining the ATOM Shake Table in a Lab Environment
- Revolutionize Your Research with an Affordable Shake Table
- Related QuakeLogic products and technologies
- QuakeLogic Engineering Blog topic resources
References
Recommended Diagram or Download
Media placeholder: Add an original diagram showing the measurement chain from sensor or test platform to data acquisition, analysis, engineering interpretation, and reporting. Where this article becomes a buyer guide or application note, create a downloadable PDF version after engineering review.
Discuss a Monitoring or Testing Application
QuakeLogic supports seismic monitoring, earthquake early warning, structural health monitoring, infrasound monitoring, vibration monitoring, data acquisition, and shake table testing applications. For project-specific guidance, contact QuakeLogic with the asset type, measurement objective, site constraints, and required deliverables.